v2
What's new in this release
Text styles, unwired detection & token-aware code
v2 closes the gap between Figma and code: text styles ship as proper W3C tokens, an Unwired report flags every hardcoded value across your file, and the AI generator now produces code that consumes your var(--token) references instead of inlining hex.
What is Design System Sync?
Design System Sync is a Figma plugin that automatically exports your design tokens (variables, text styles) and components to GitHub or Bitbucket, keeping your code and design perfectly in sync.
Variables & Text Styles v2
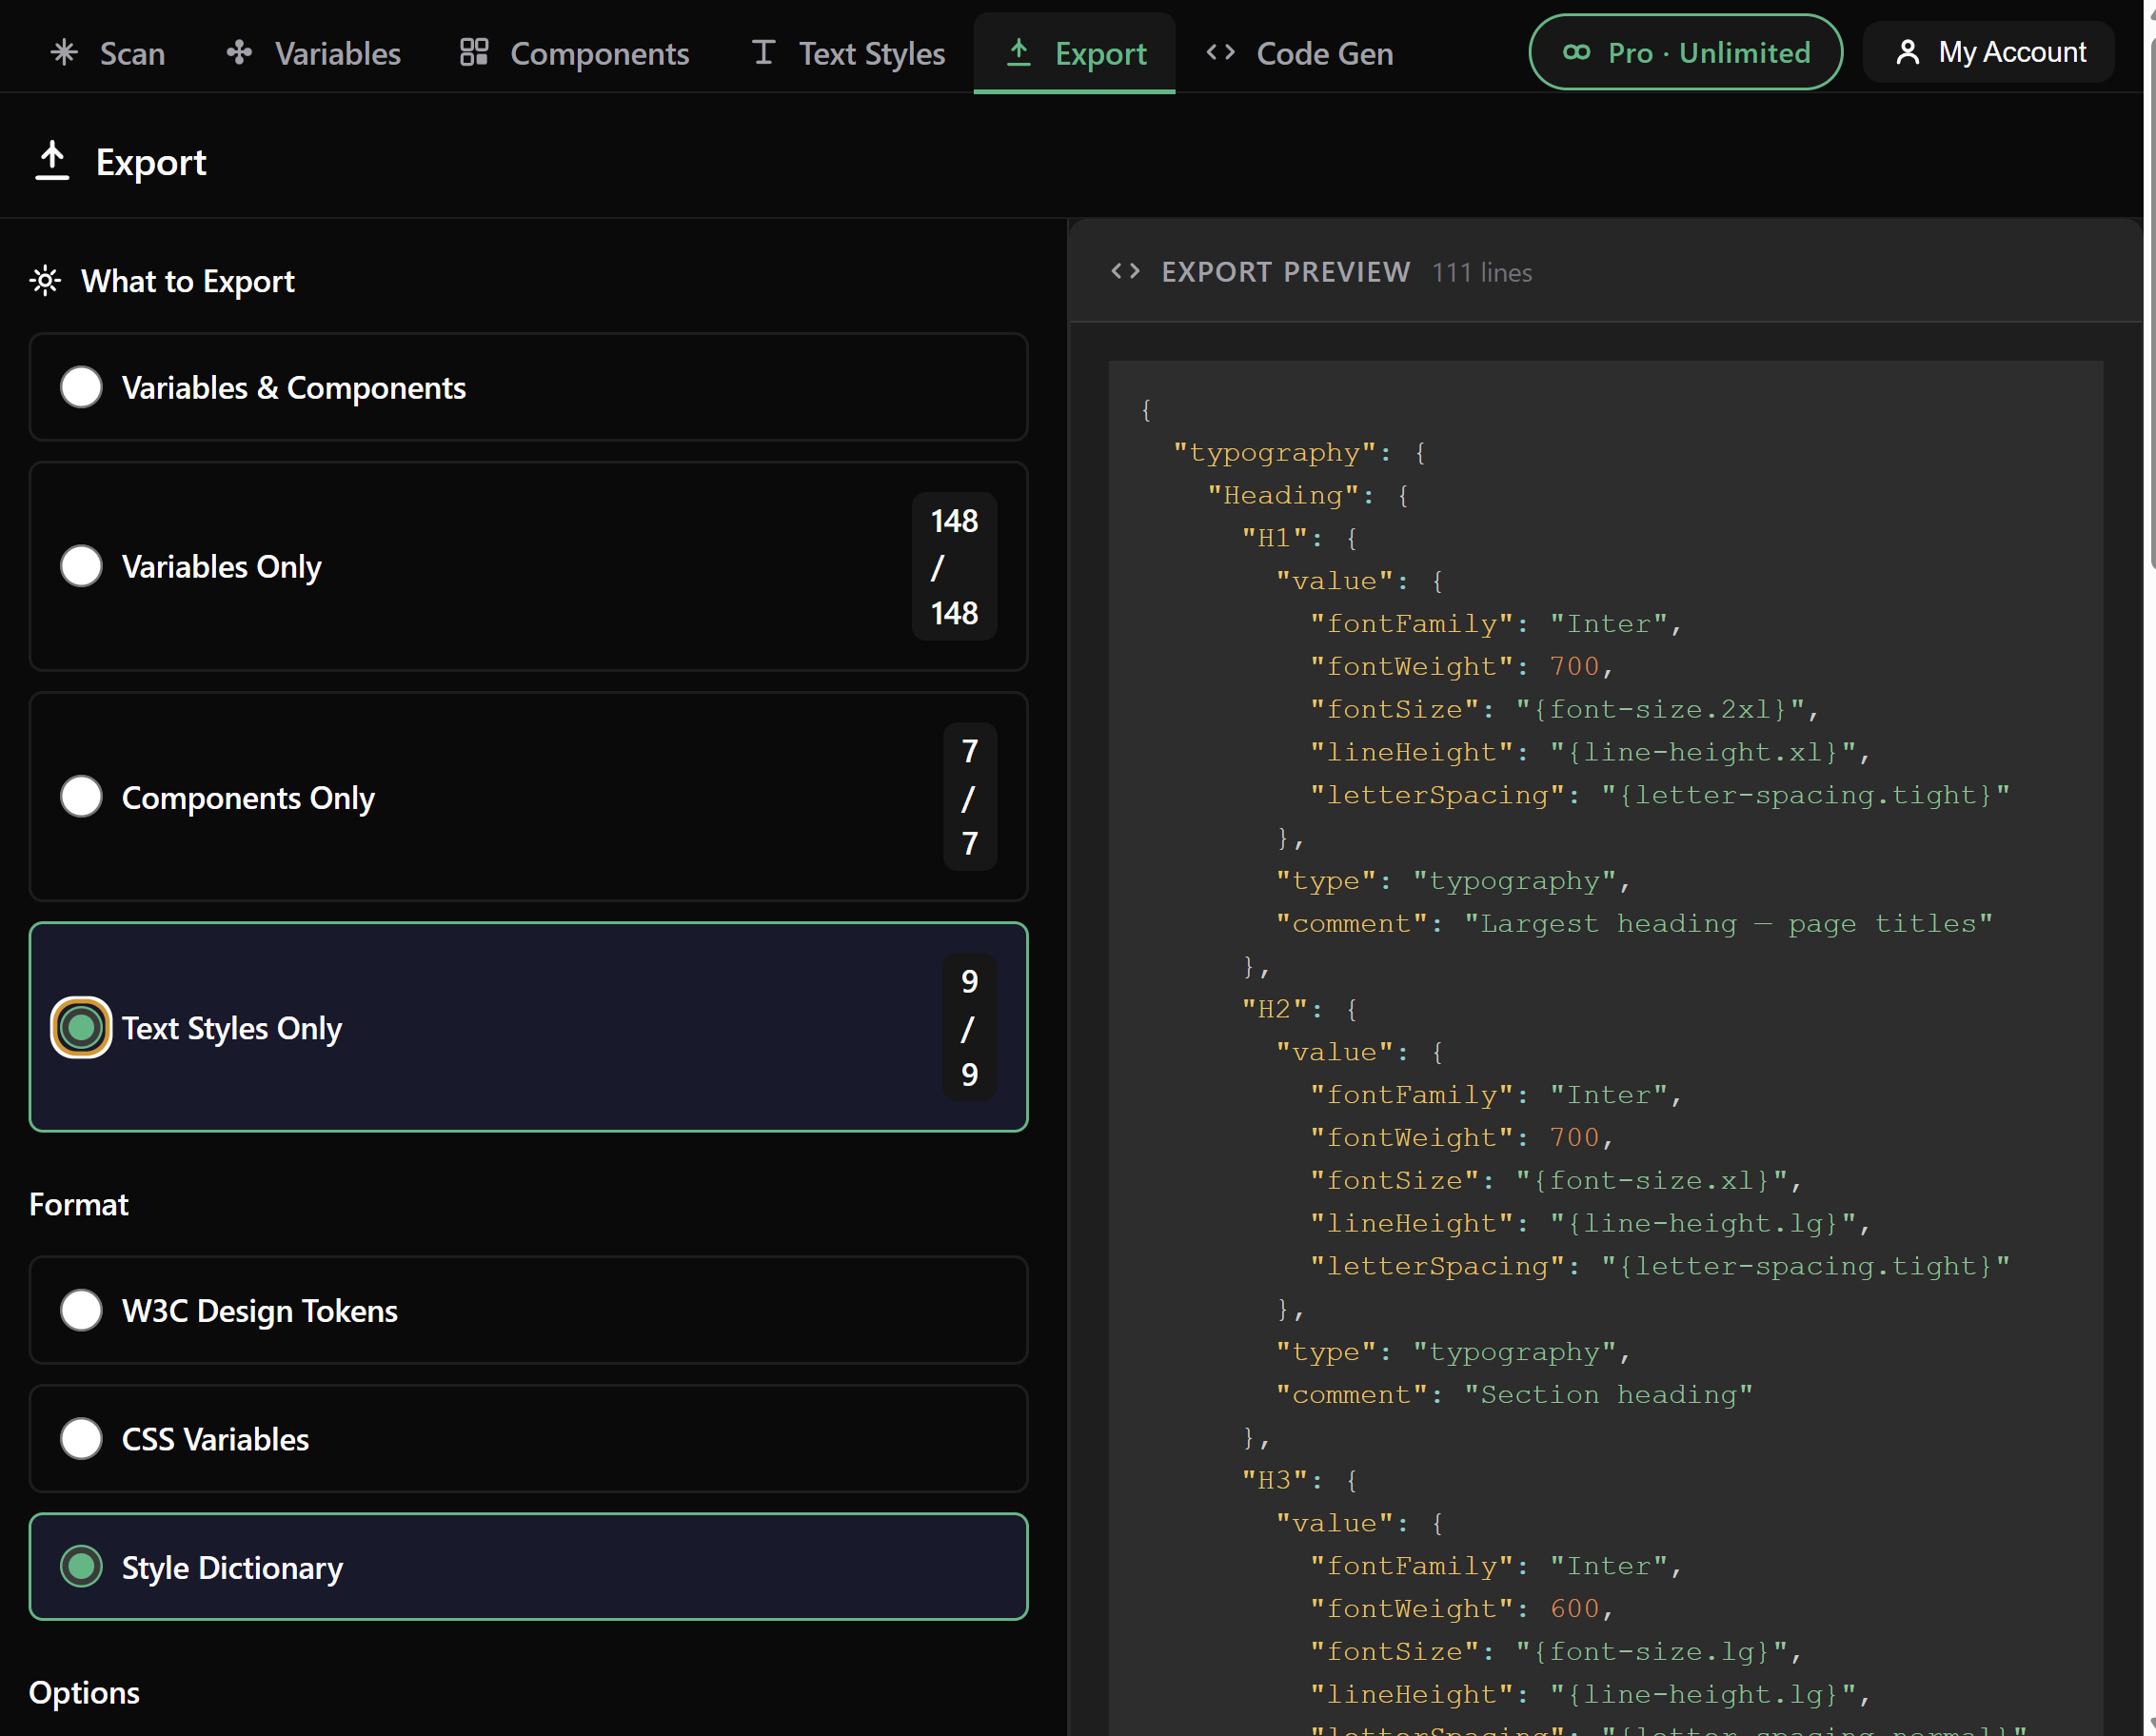
Export design tokens and text styles to W3C, Style Dictionary or CSS — bound variables preserved as proper aliases
Export Components
Component metadata & variants - Choose what to export: variables, components, or full sync
Auto Pull Requests
GitHub & Bitbucket
Change Detection
See what changed
Token-Aware AI Code Gen PRO
Transform Figma components into production-ready React or HTML — output preserves your var(--token) references instead of inlining hex
Getting Started
2 Open Your Design File
- Open a Figma file with design variables or components
- Right-click → Plugins → Design System Sync
- The plugin window will open
3 Choose Your Integration
The plugin has three main tabs:
- Scan Tab: View detected variables and components
- GitHub Tab: Export to GitHub repositories
- Bitbucket Tab: Export to Bitbucket repositories
GitHub Setup
Create a Personal Access Token
- Go to GitHub Settings → Tokens
- Click "Generate new token (classic)"
- Name it:
Design System Sync
- Select scopes:
- ✅
repo (Full control of private repositories)
- ✅
workflow (Update GitHub Actions workflows)
- Click "Generate token"
- Copy the token (you won't see it again!)
Configure in Plugin
- Go to GitHub Tab
- Paste your Personal Access Token
- Enter repository:
username/repo-name
- Choose base branch (usually
main or master)
- Click "Export to GitHub"
Success! The plugin will create a Pull Request with your exported design tokens and components.
Export Formats
Variables (Design Tokens)
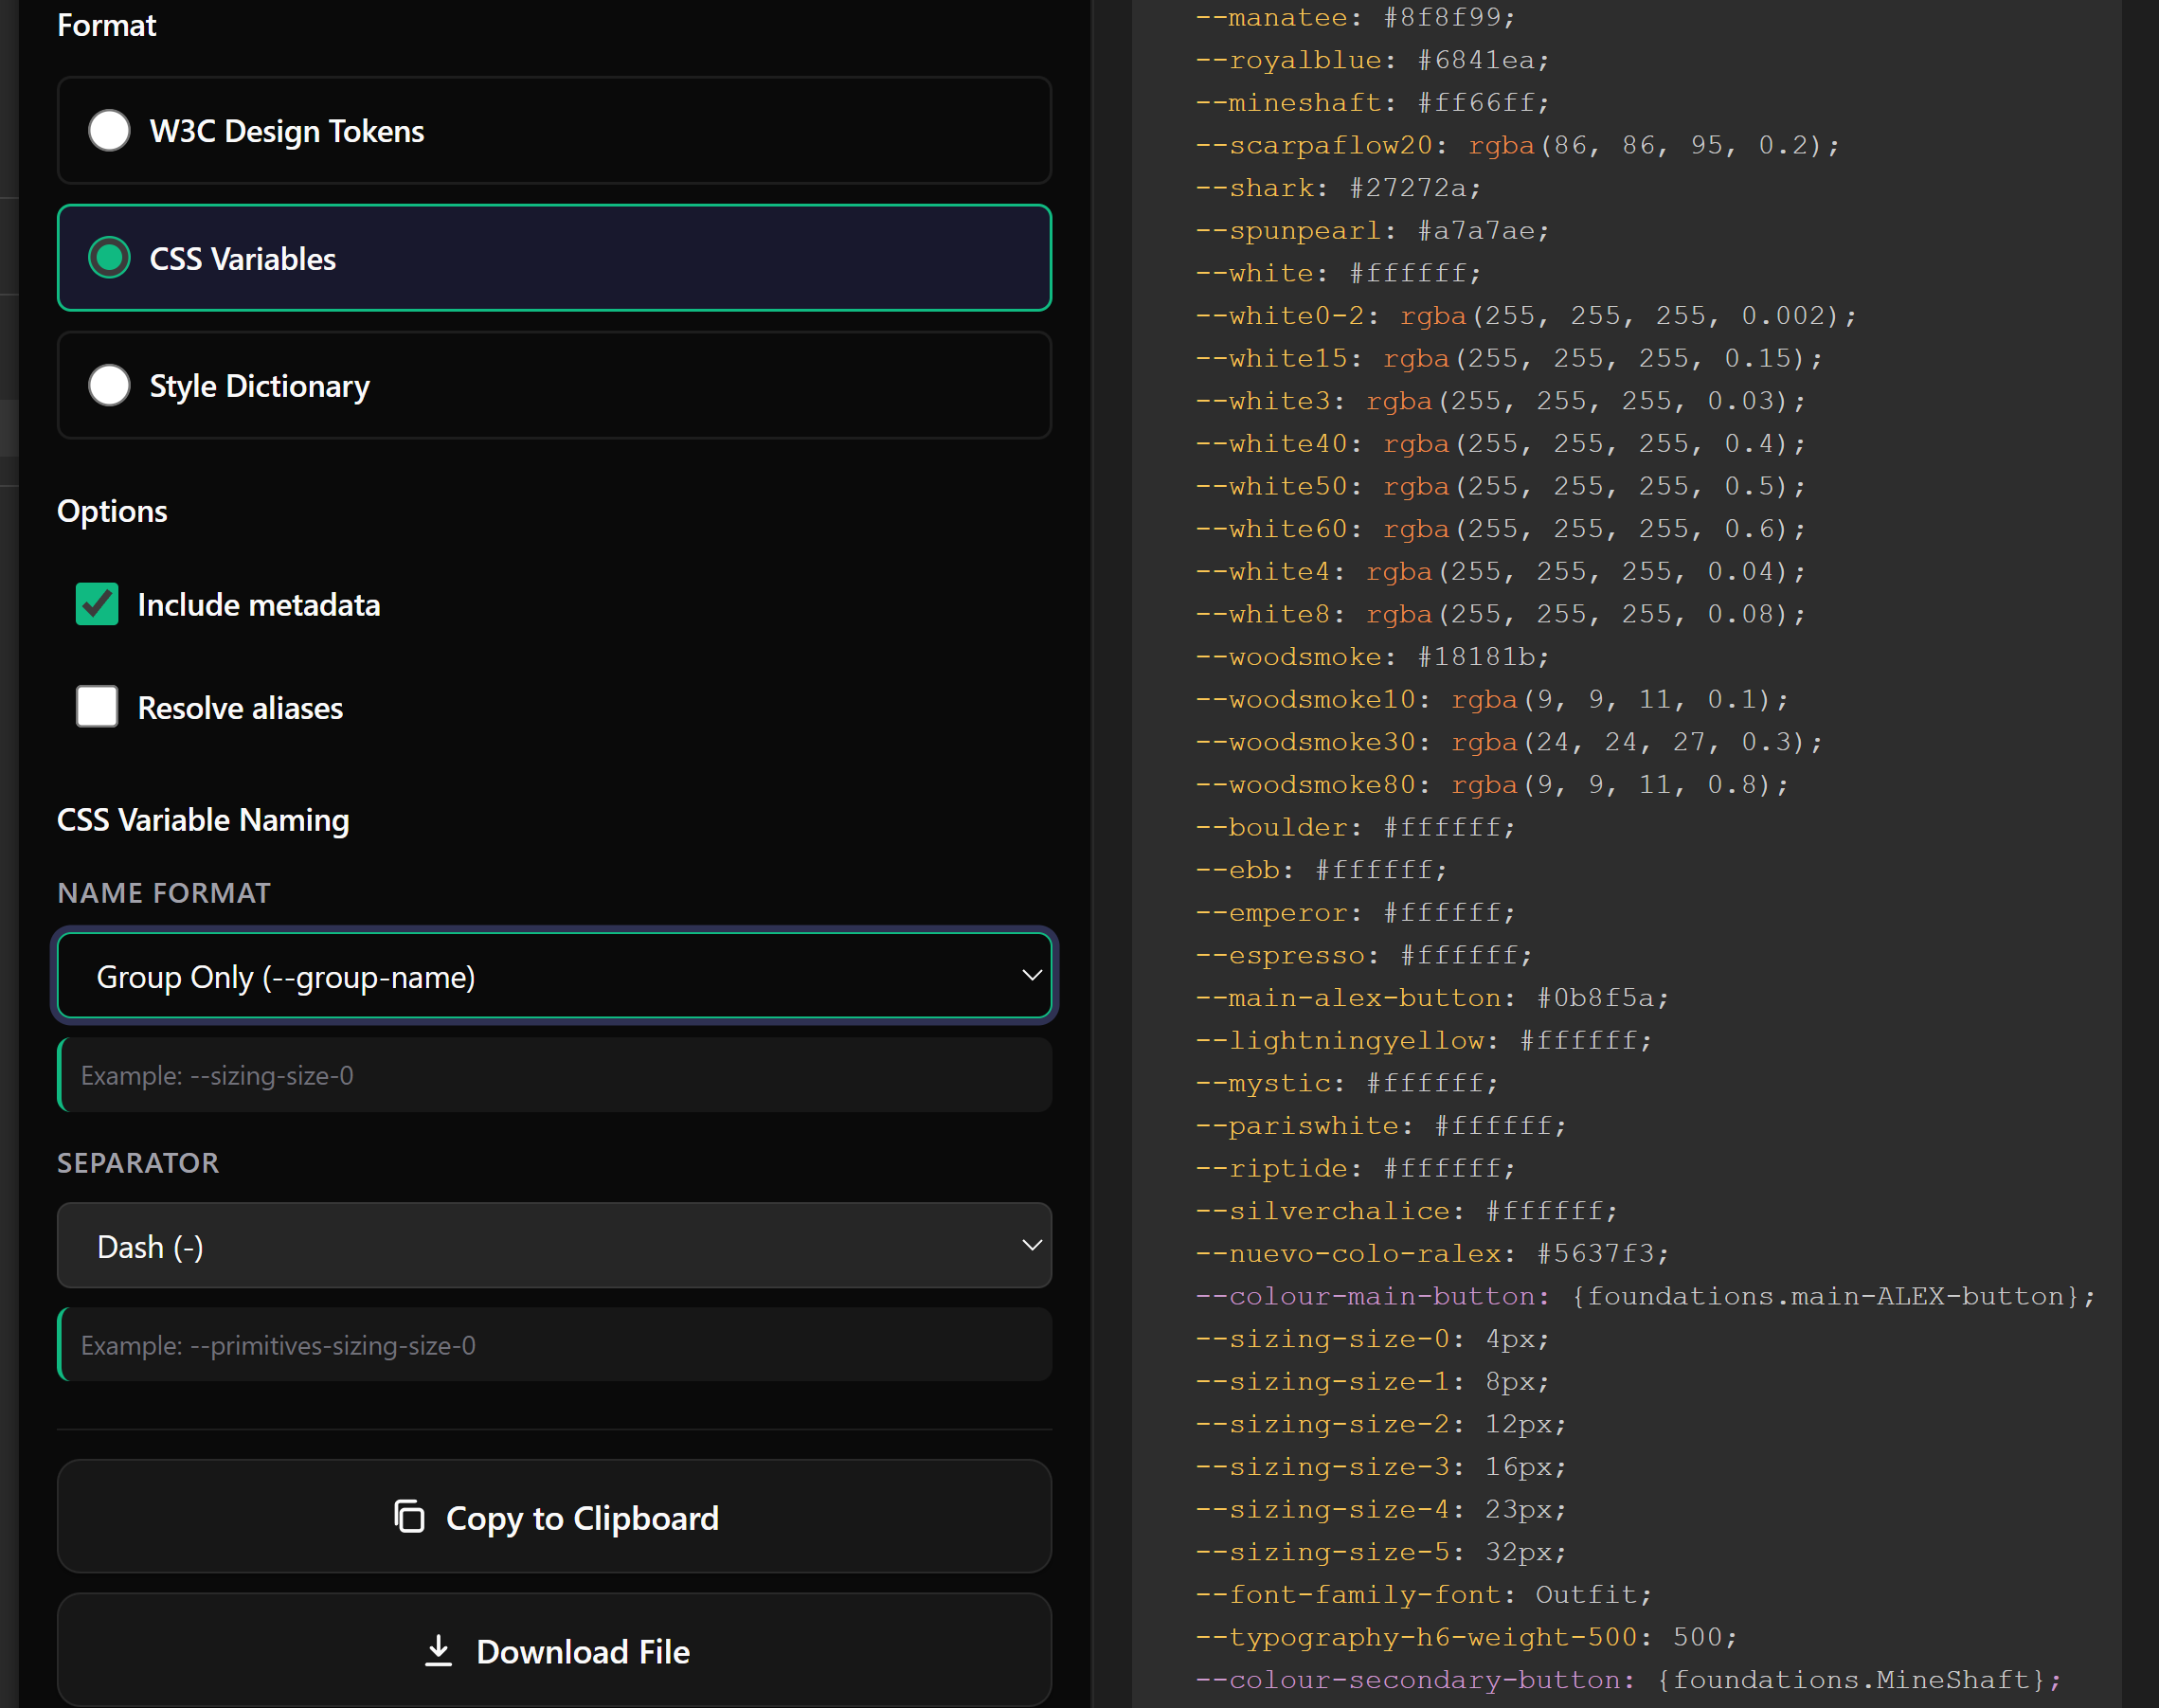
Exported as JSON with multiple format options:
- JSON: Raw token data
- CSS Variables:
--color-primary: #0066ff;
- Style Dictionary: DTCG-compliant format for design tokens
- W3C Design Tokens:
$type / $value with alias references like {color.primary}
Text Styles v2
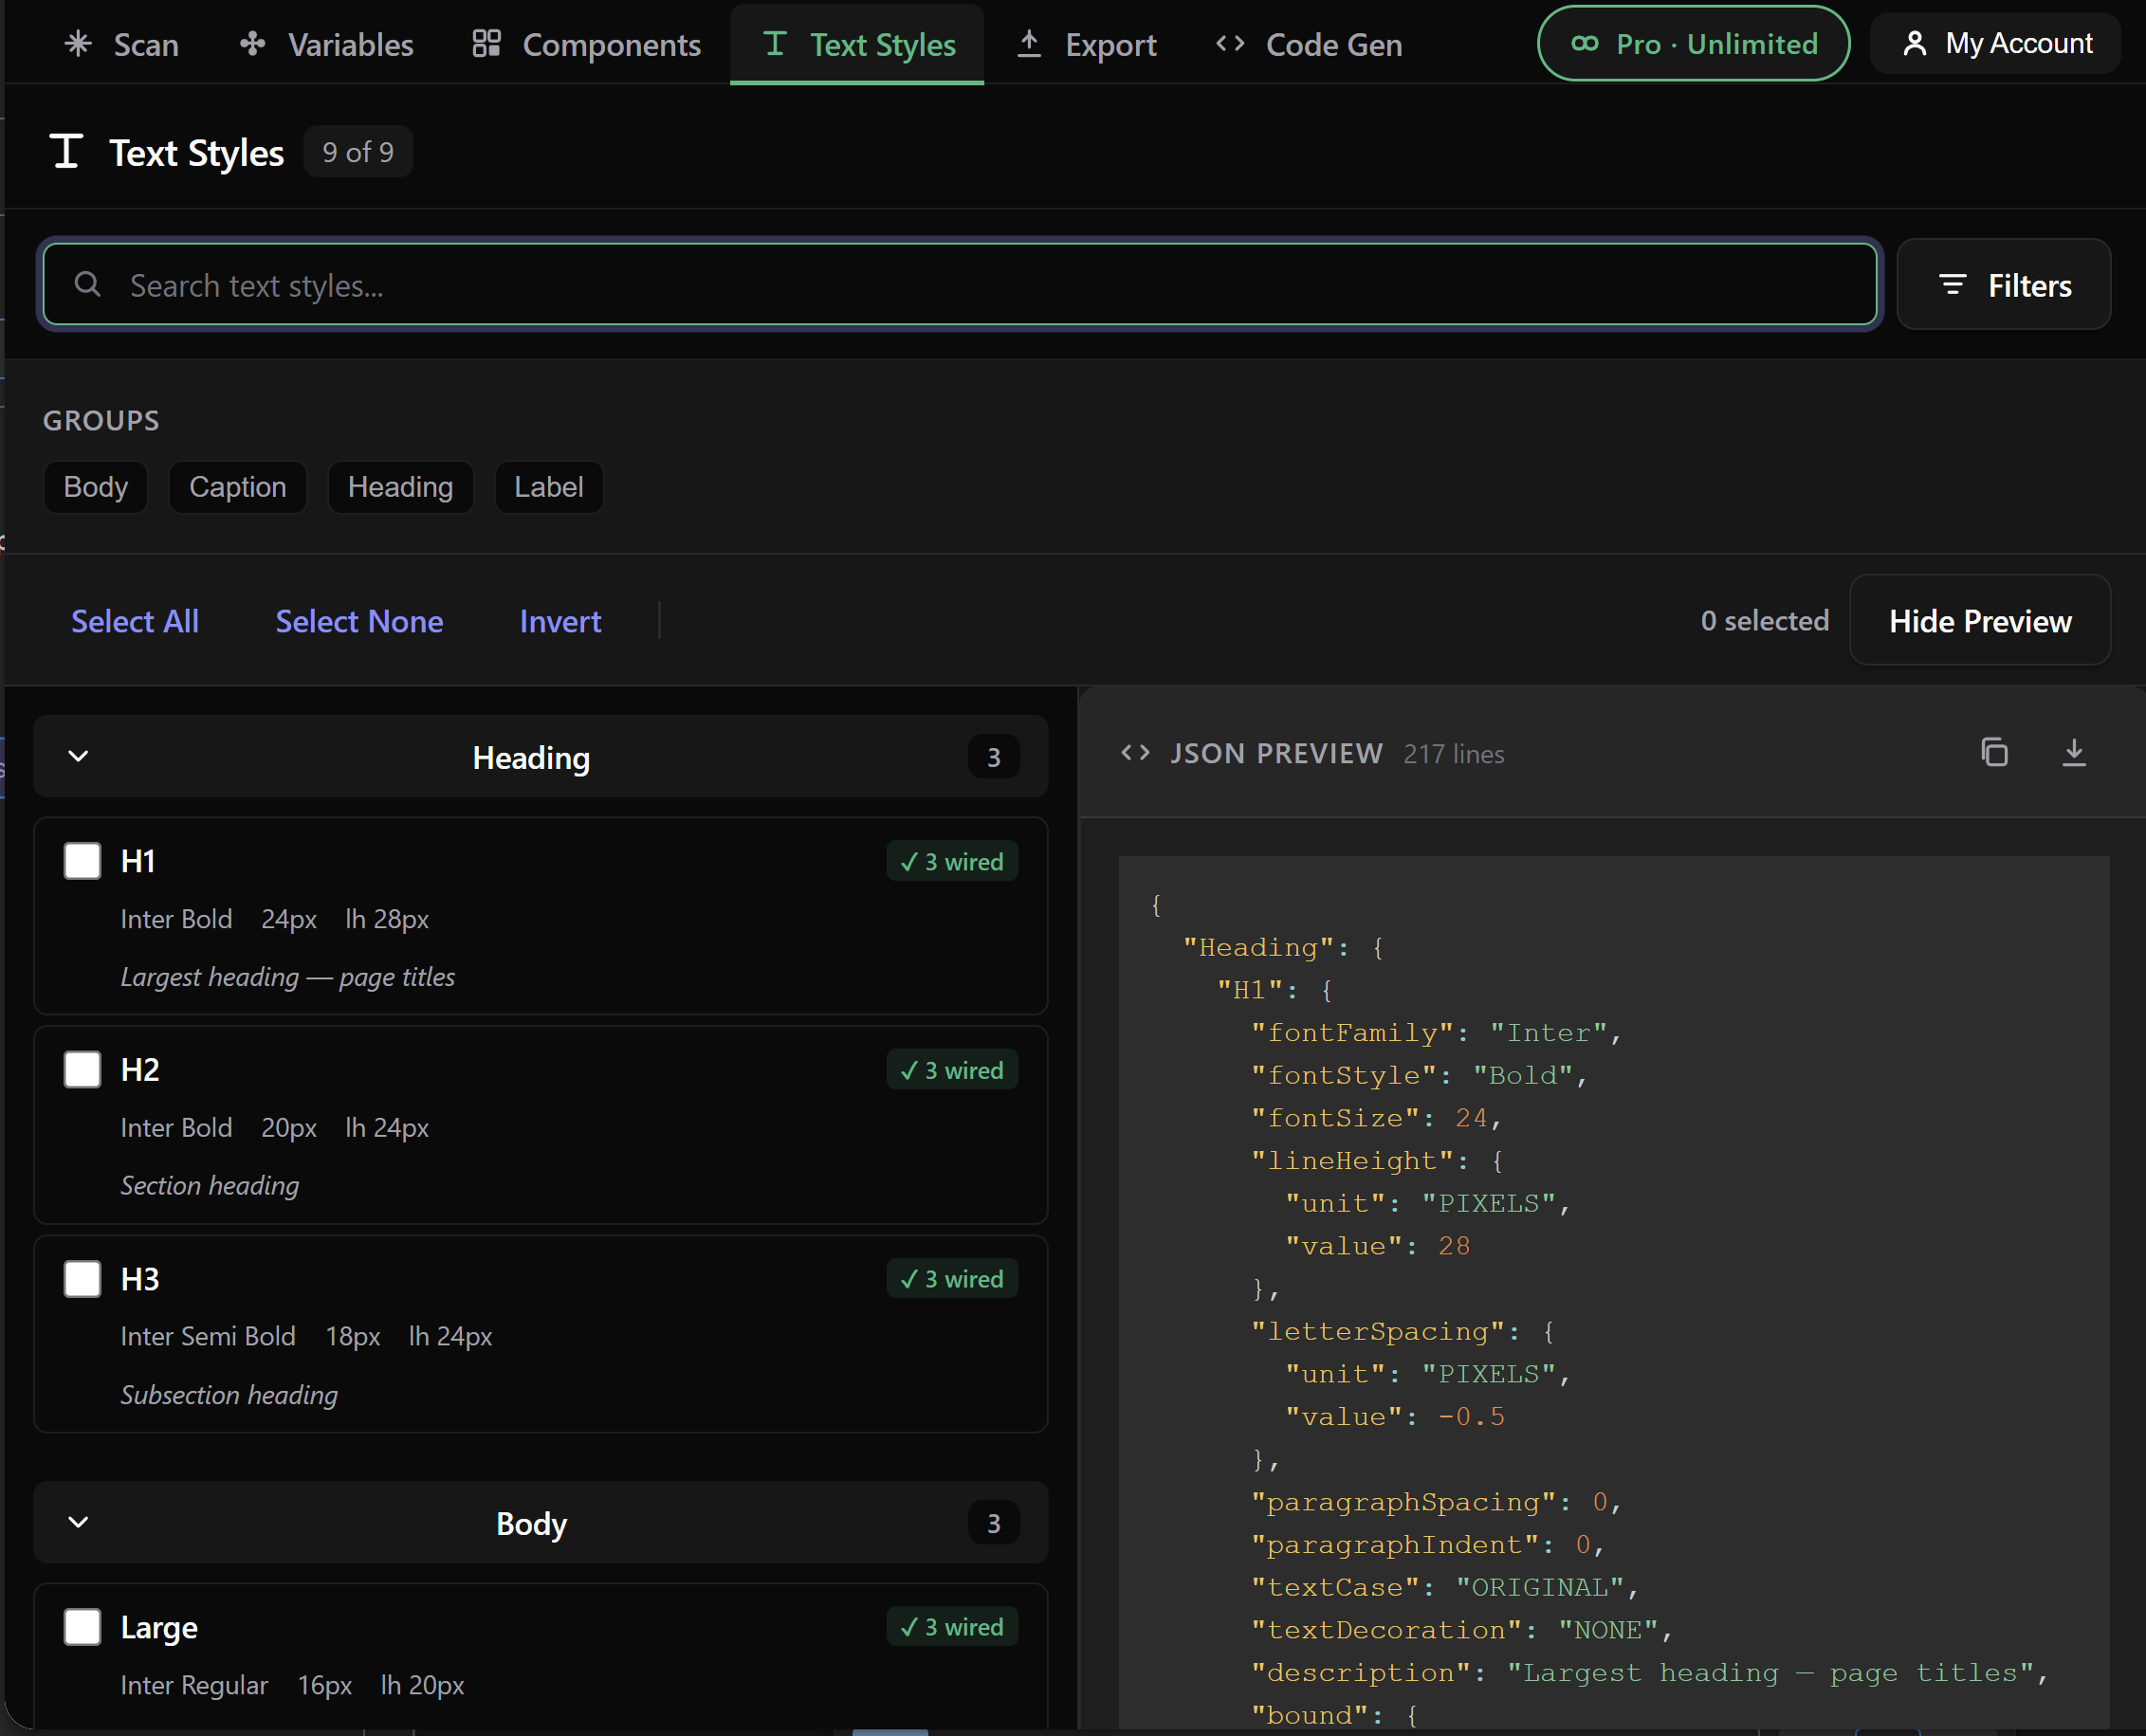
Text styles are now first-class tokens. The plugin reads every local text style, resolves any bound variables on properties like fontSize, fontFamily or lineHeight, and exports them in the same formats your variables already use.
- W3C output uses
$type: "typography" and emits aliases like {font.size.lg} instead of hard literals
- Style Dictionary output is DTCG-compatible and references the same alias paths
- CSS output flattens to readable custom properties such as
--text-heading-h1-font-size
- Units are normalized —
letterSpacing, lineHeight and textCase map to standard CSS values (e.g. AUTO → normal, PERCENT → %, PIXELS → px)
- Collection names are intentionally stripped from token paths so output stays portable across Figma file structures
Why this matters: When a designer renames a font-size variable in Figma, the W3C and Style Dictionary outputs follow the rename automatically — because text styles point at aliases, not literal values.
Components
Exported as structured JSON with:
- Component metadata (name, description, URL)
- All variants and properties
- Style information
- Change history
Unwired Value Detection v2
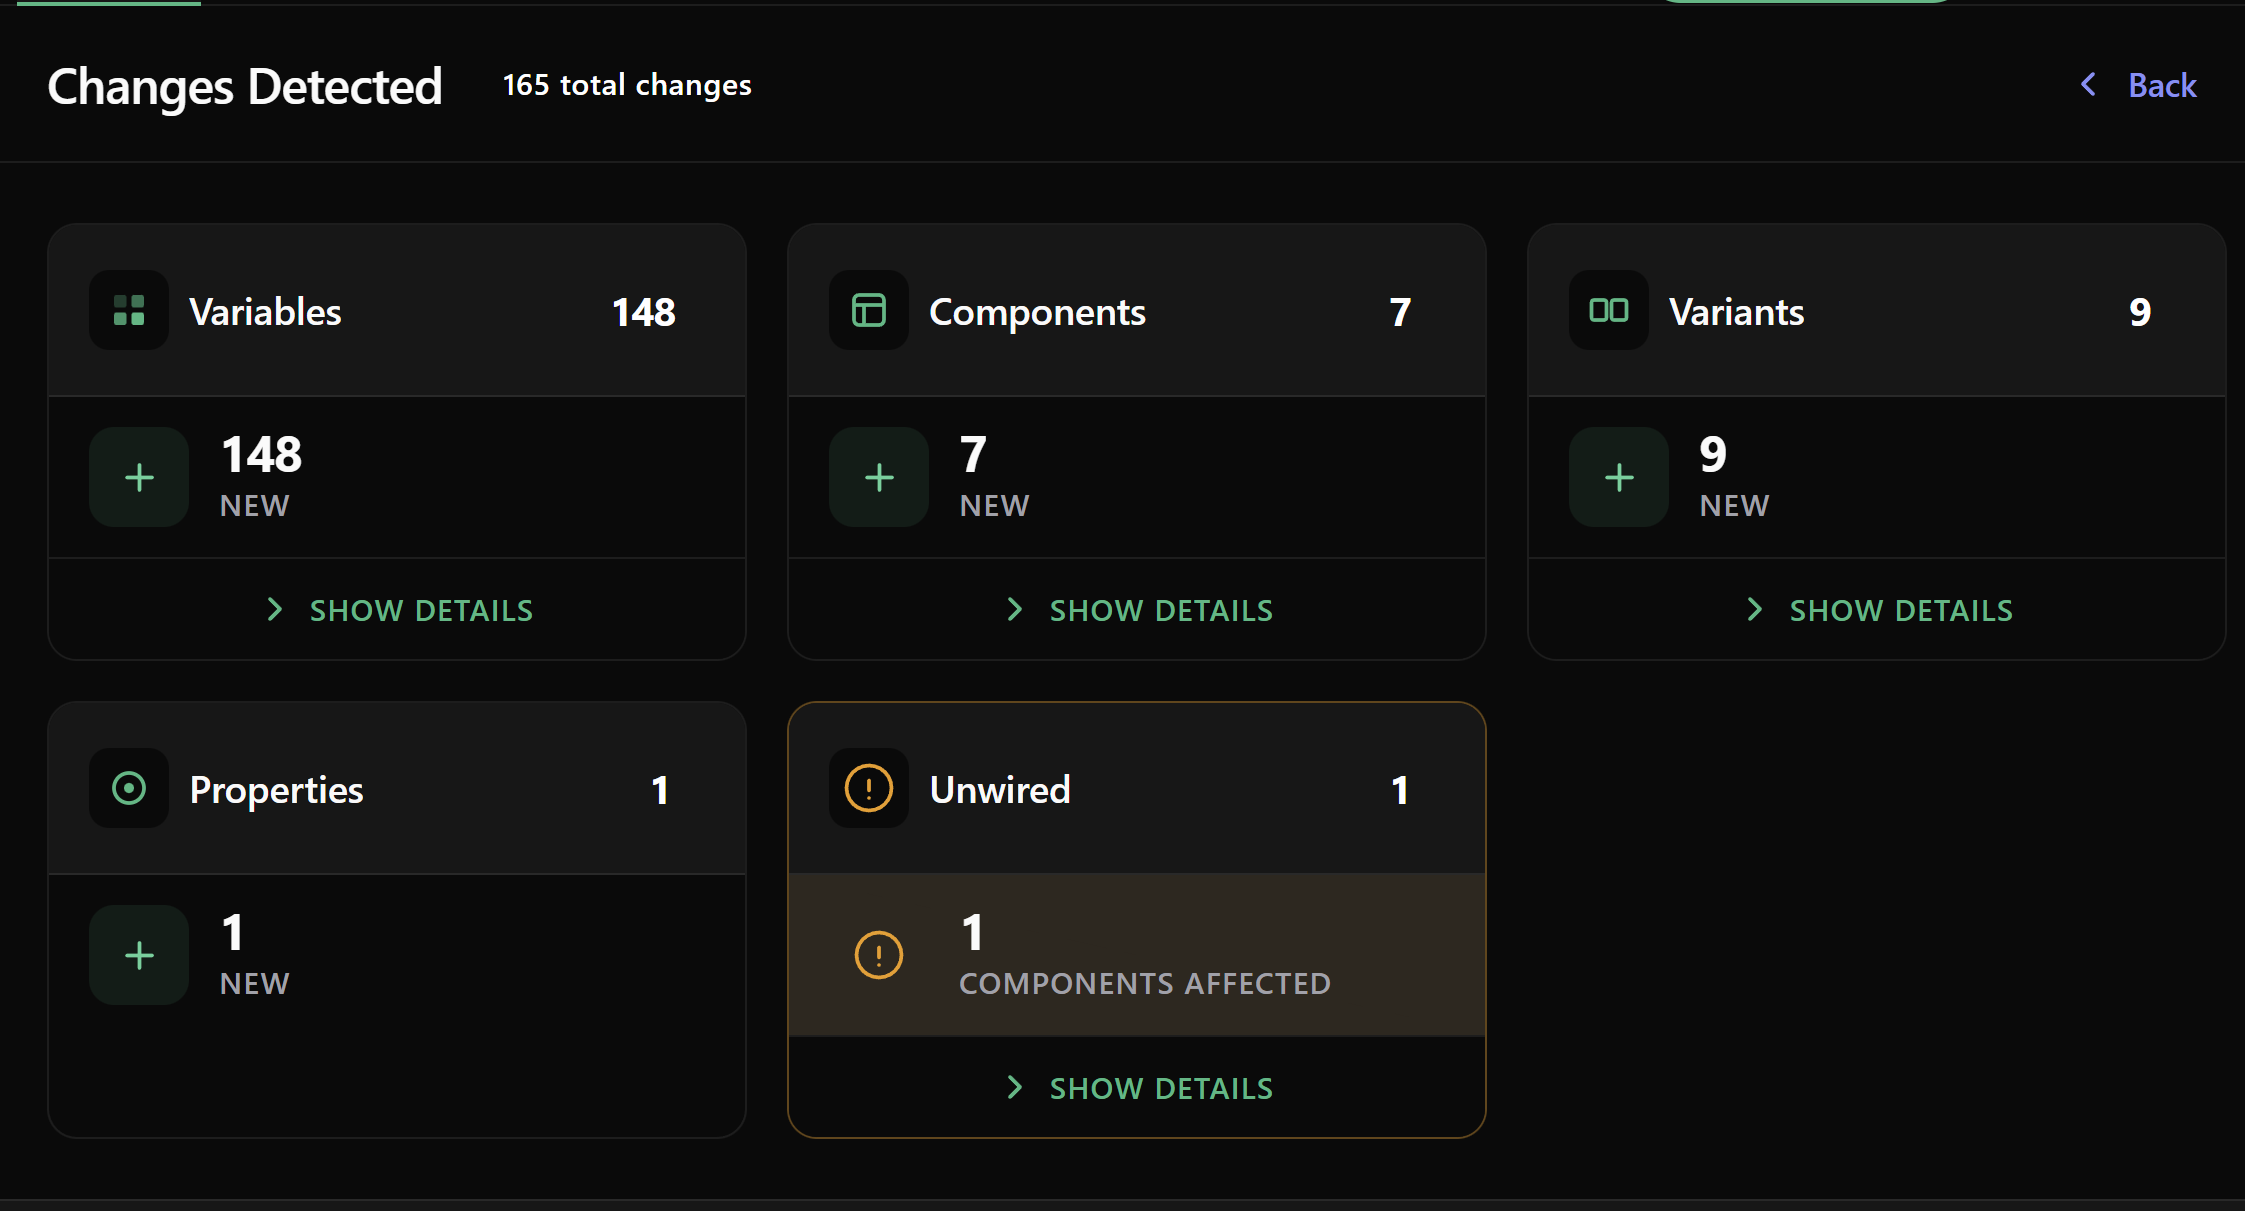
The Unwired report scans every component, variable and text style in your file and lists the exact properties that still hold a raw value instead of pointing at a token. Use it as a checklist when migrating an existing design system to variables, or as an ongoing coverage metric.
How to use it
- Run a Scan on the current Figma file
- Open the Unwired tab
- Each row shows the component (or variable / text style), the property, and the literal value still in use
- Wire the variable in Figma, re-scan, and watch the row disappear
What it covers
- Colors — fills, strokes, effect colors
- Layout — spacing, gaps, padding, radii
- Typography — font size, family, weight, line height, letter spacing on text styles
- Variables that reference other variables — alias chains are followed once
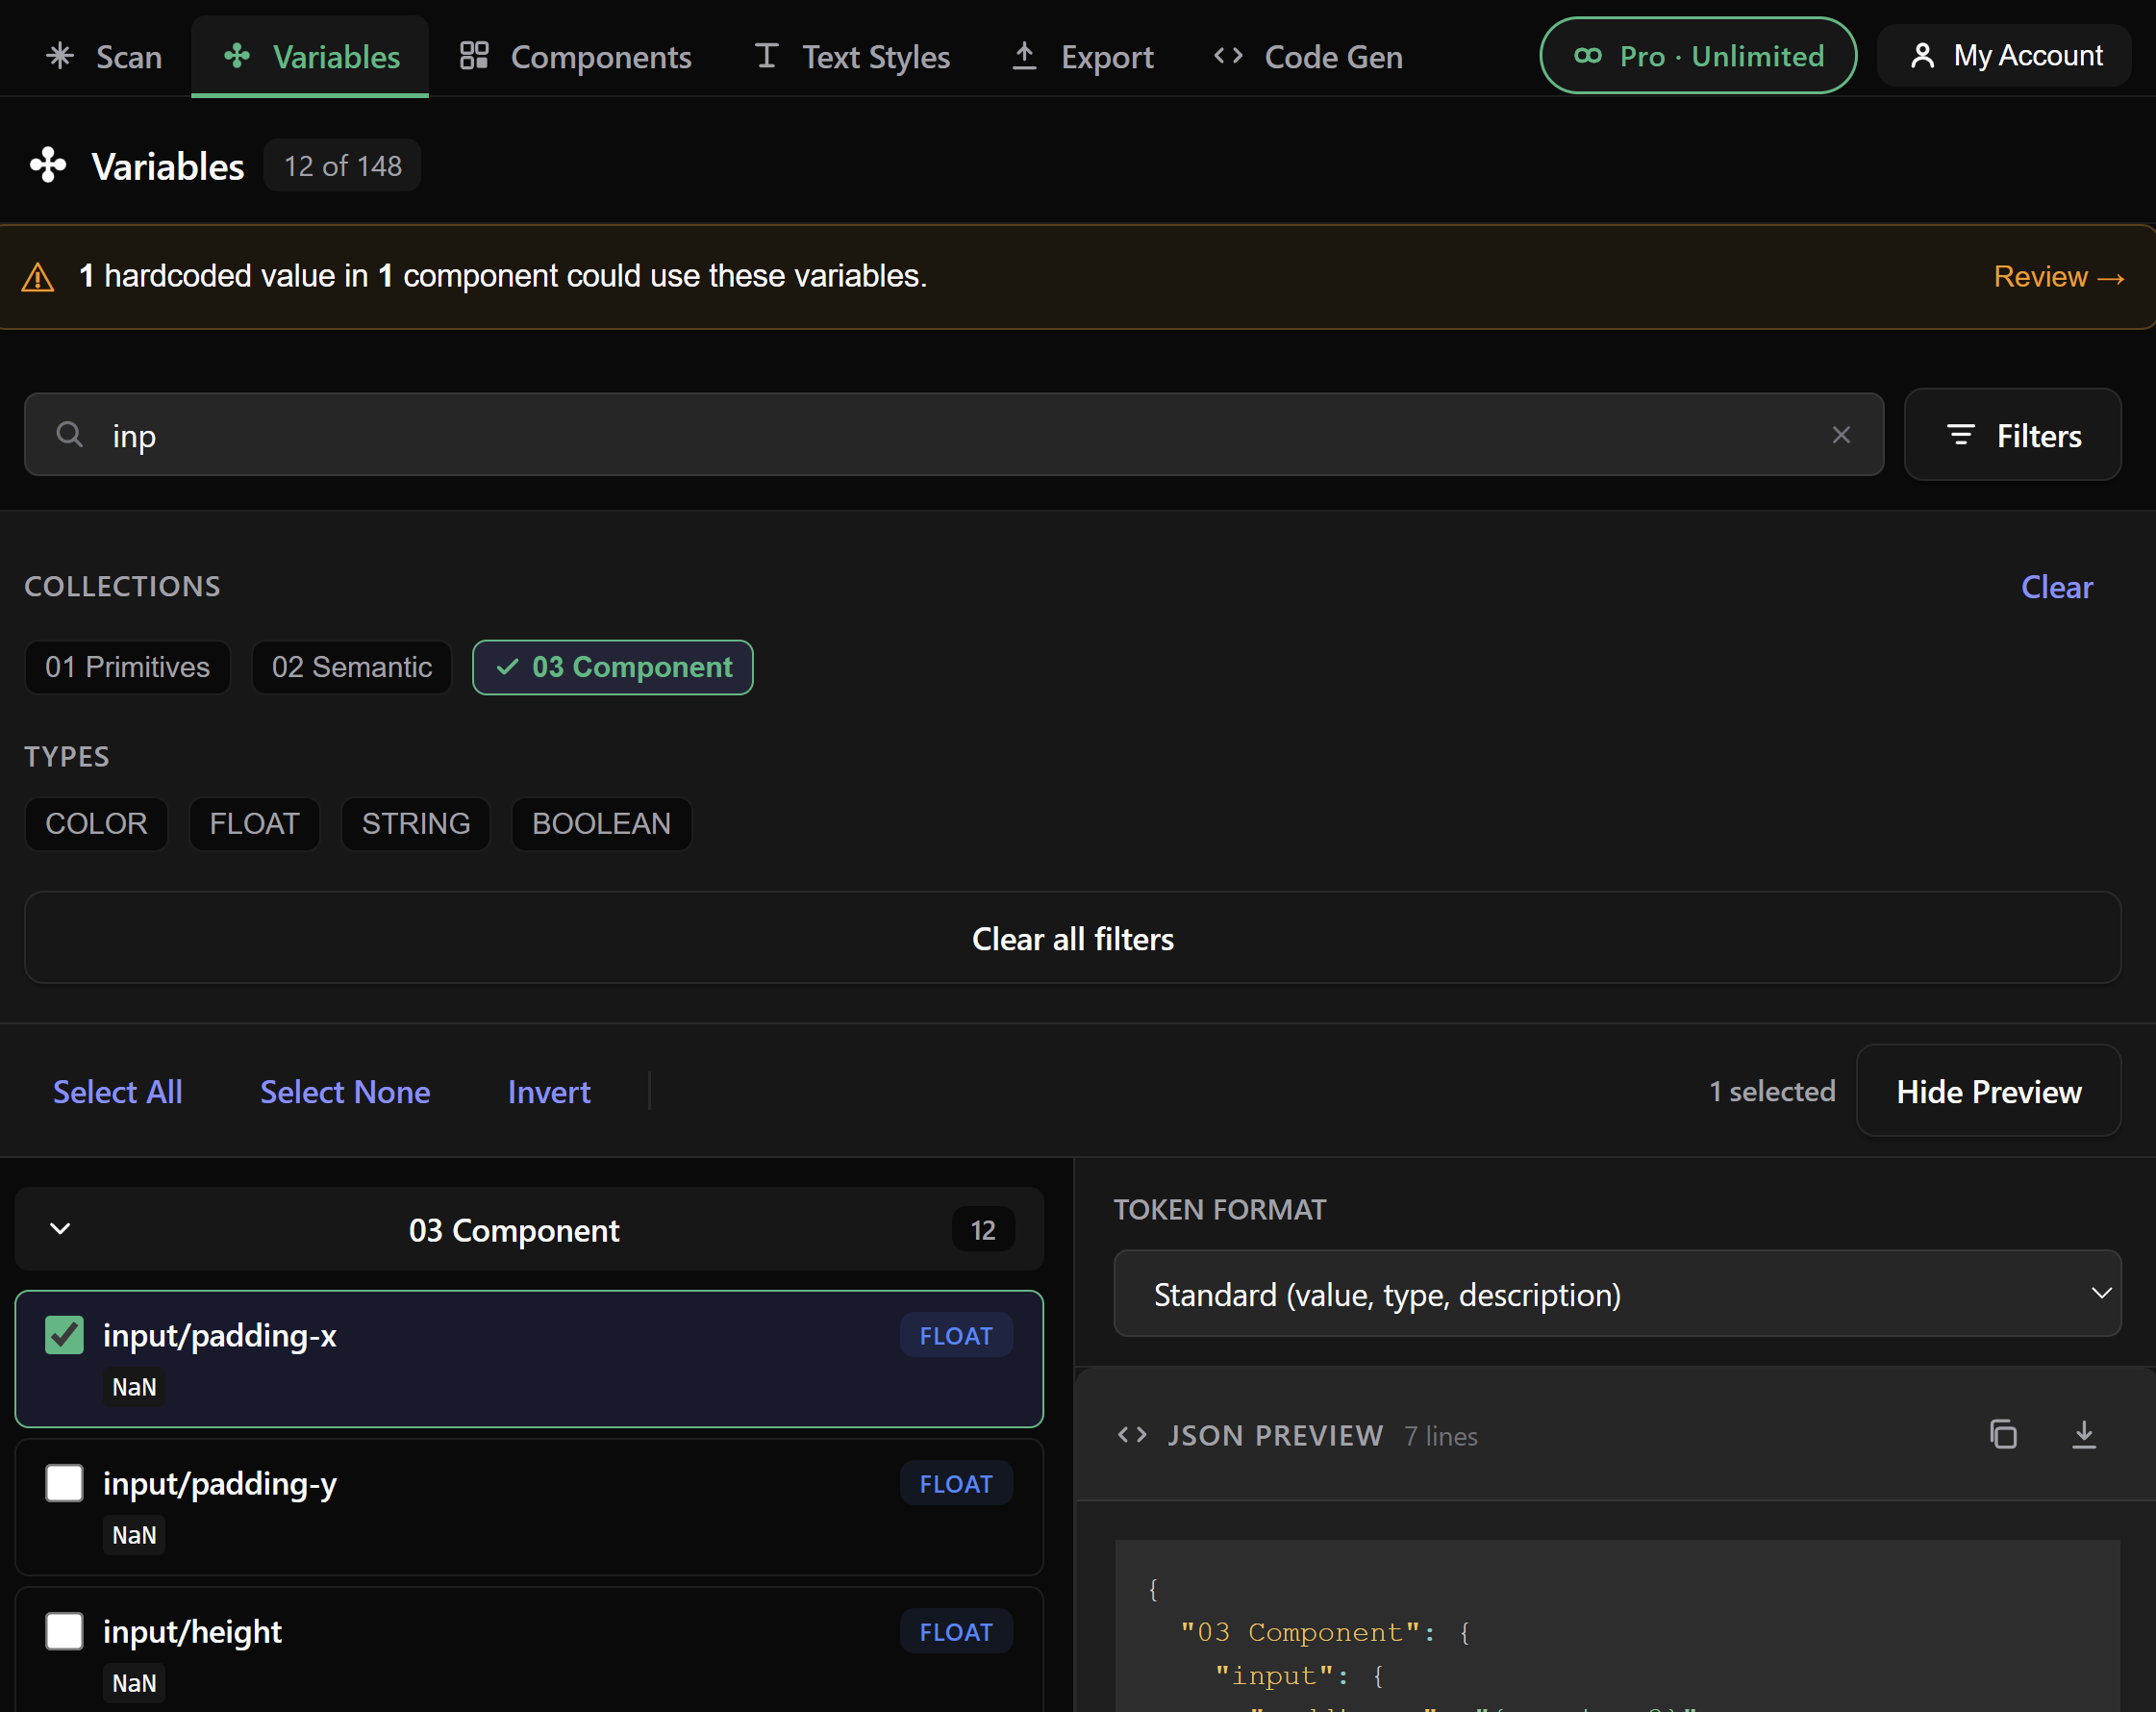
Generic by design: the report doesn't assume any naming convention. It reads your tokens, your conventions, and surfaces only what you actually have to fix.
Token-Aware AI Code Generation v2
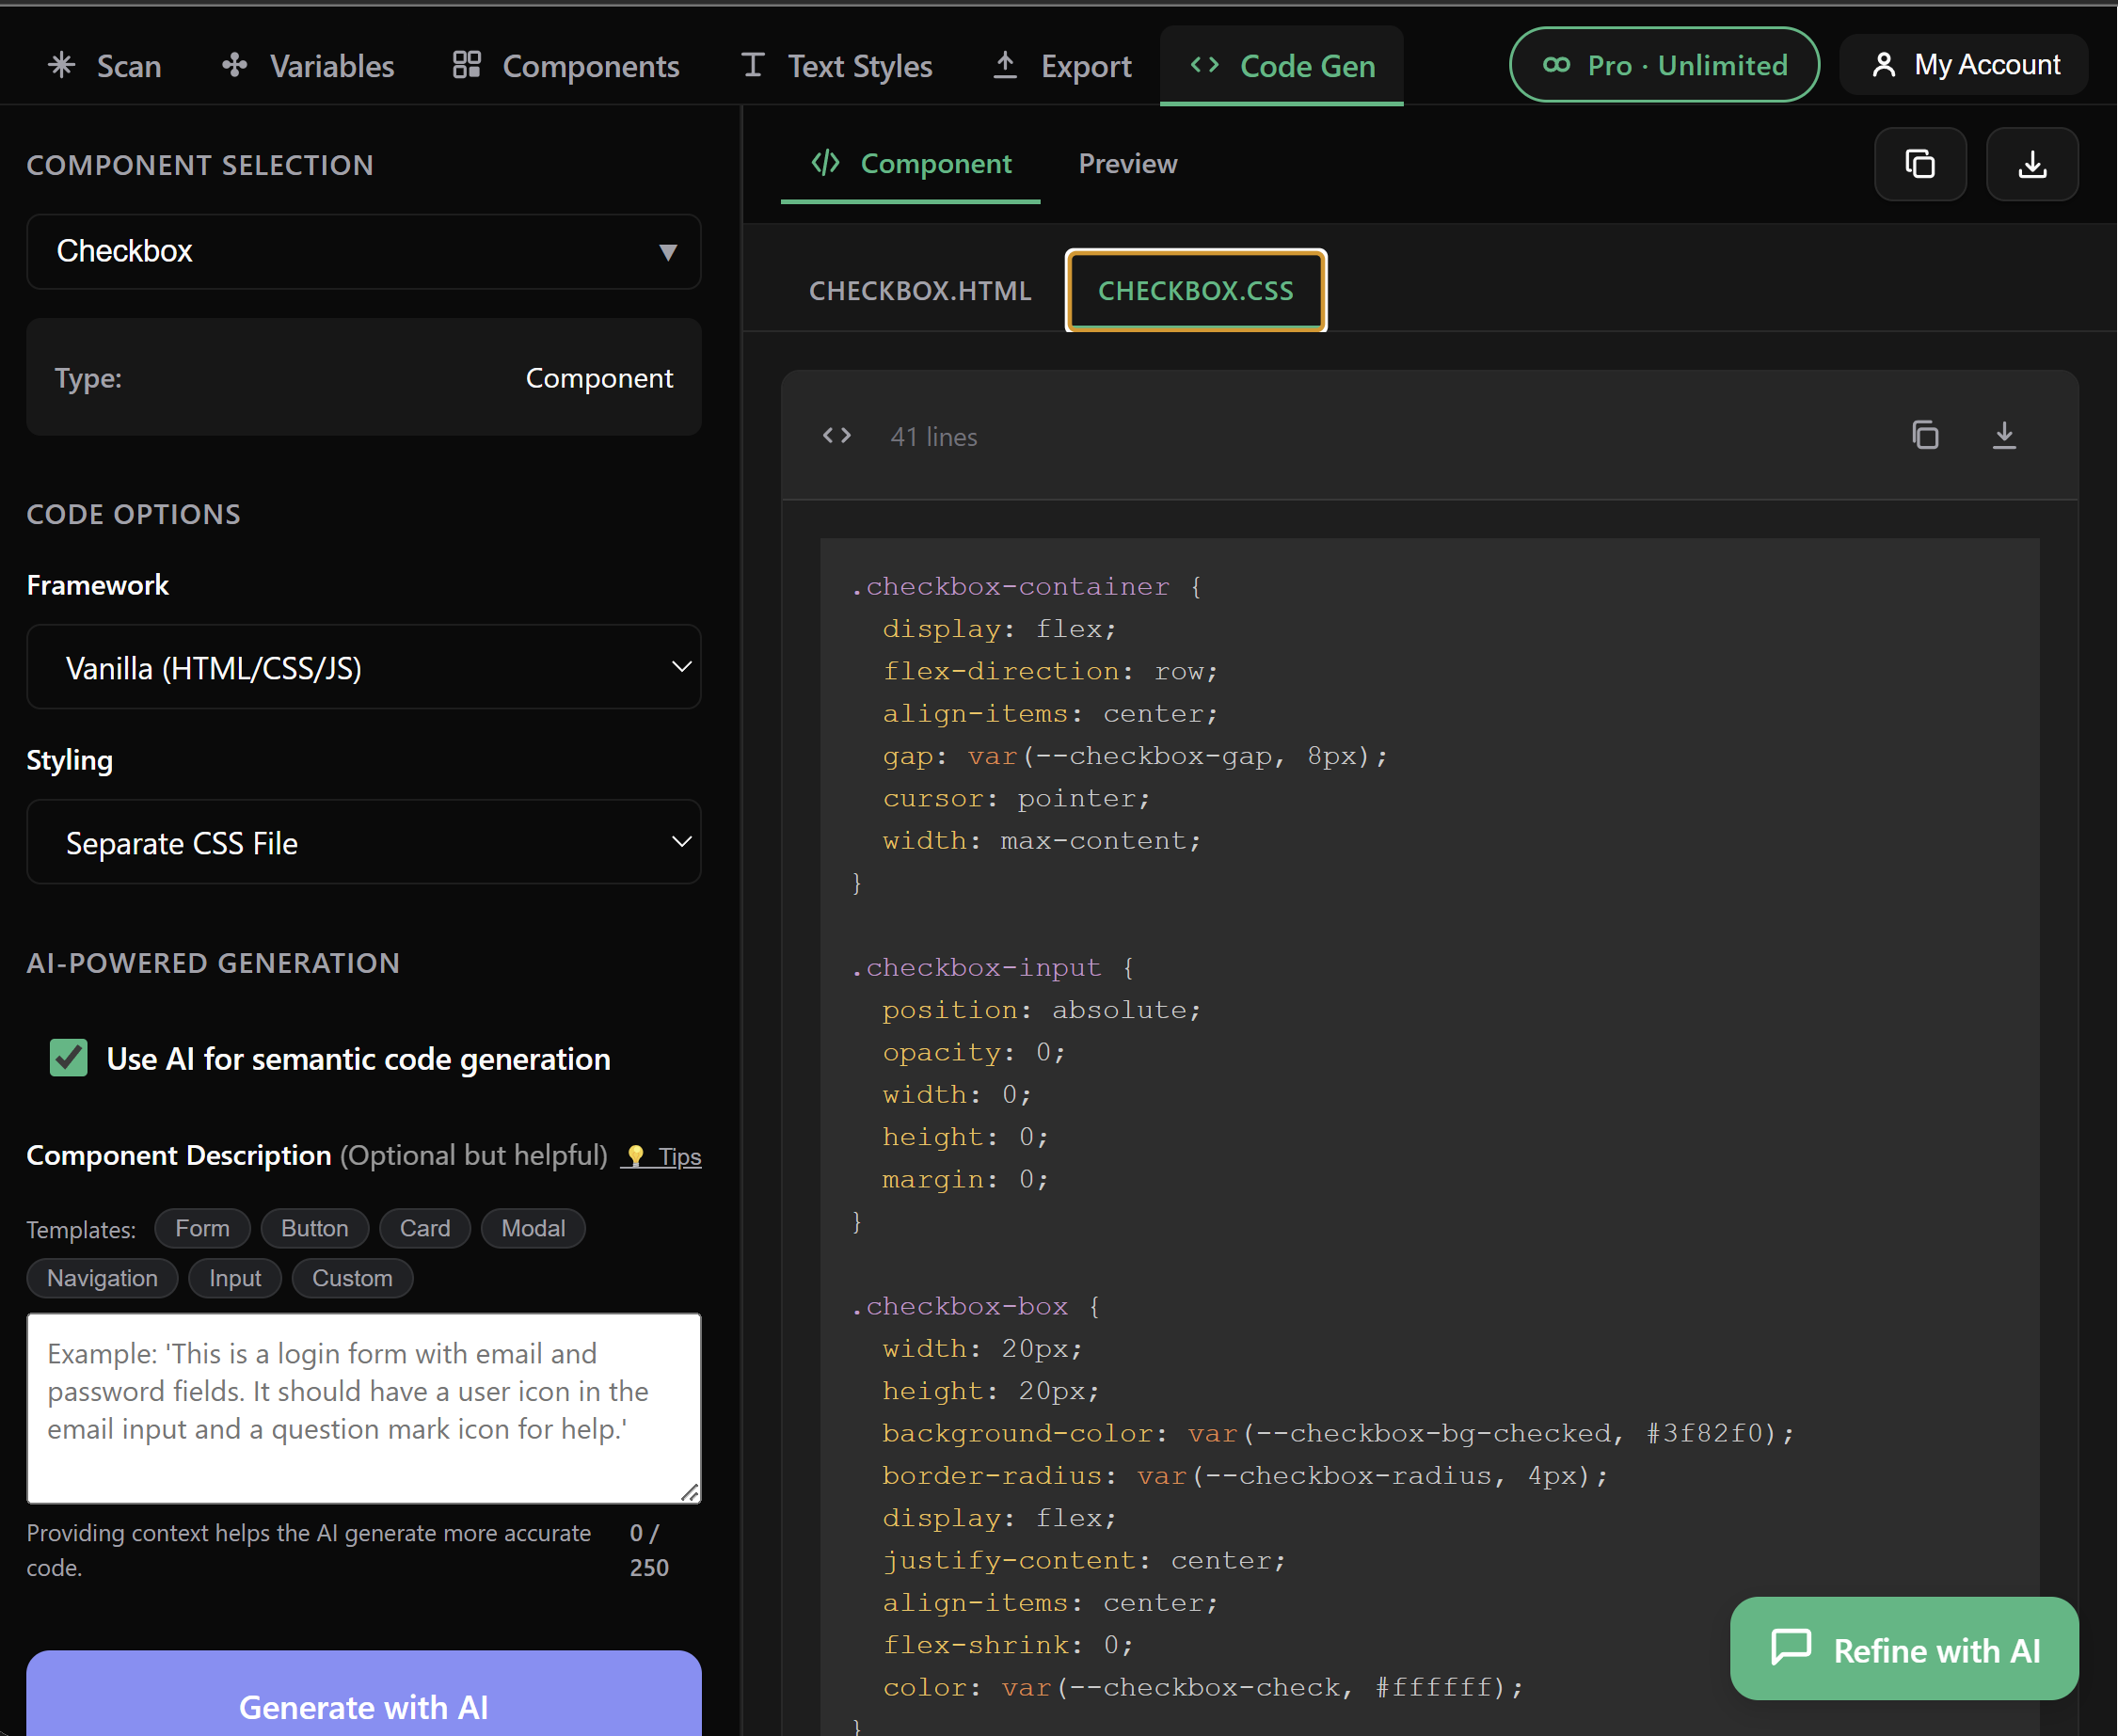
The AI code generator was rewired so output preserves your token references end-to-end. Instead of inlining #10B981 or 16px, generated components consume your variables directly through var(--color-primary) and friends — meaning a refactor in Figma propagates straight into your codebase.
What changed
- System prompt now instructs the model to preserve
var() references verbatim instead of resolving them to hex
- Components, variables and text styles all flow into the same prompt context, so the model has the full token vocabulary available
- Multi-variant component sets generate every variant, not just the first one
- Generation state persists across tabs — long generations are no longer lost when you switch to the Variables or Components view
How to use it
- Open the Code Gen tab (Pro feature)
- Pick a component or component set from your scan
- Choose React or HTML/CSS output
- The generated code references your tokens — copy it straight into your repo
Tip: The more variables you have wired (run the Unwired report first), the more useful the generator becomes — it can only reference tokens that actually exist in your file.
Subscription Plans
Three plans. Free covers individuals exploring the plugin; Pro adds the AI codegen and one-click Unwired wiring; Studio is the choice when you work across multiple computers.
Free 1 device
- 5 exports per month
- All export formats (W3C, Style Dictionary, CSS)
- Text Styles export
- Unwired report (read-only — see hardcoded values, upgrade to wire them)
- GitHub & Bitbucket auto-PRs
- Community support
Pro $10/mo · 1 device
Billed annually at $120/yr — save 17% vs monthly. Monthly available at $12/mo.
- ✨ Unlimited exports per month
- ✨ Token-aware AI code generation — output uses your
var(--token) references instead of raw hex
- ✨ Connect Unwired — one click wires every exact-match hardcoded value to its design token (see section below)
- ✨ Everything in Free
Studio $16.67/mo · multi-device
Billed annually at $200/yr — save 33% vs monthly. Monthly available at $25/mo.
- 🎟️ Everything in Pro
- 🎟️ Multi-device access — register the same email on Mac, PC, work + home, all under one subscription. No DEVICE_MISMATCH locks.
- 🎟️ Priority support — direct email response within 24 hours
- 🎟️ Beta access to upcoming features (Tailwind v3/v4 export, Flutter, …)
How to Upgrade
- Click the ⭐ Upgrade button in the plugin's top-right corner (visible whenever you're on Free or Pro)
- Choose between Annual (recommended — saves 17-33%) and Monthly
- Pick Pro or Studio
- Complete payment through Stripe — promo codes are accepted (ANNUALDEAL, DSSYNC30, DSSYNC20)
- The plugin polls Stripe and updates your tier automatically — you'll see confetti and a "Welcome to Pro/Studio!" toast within a few seconds
Multi-device join (Studio only)
Once you're on Studio, simply open the plugin on your second device and enter the same email you used for your first. The plugin recognizes the existing Studio subscription, joins this device to it automatically, and you're ready to go — no extra payment, no re-registration friction.
If you previously hit "license is tied to one device" on a Pro plan, upgrading to Studio unlocks the device restriction for every machine under the same email.
Manage Subscription
After upgrading, click "My Account" to:
- View subscription status & tier
- Update payment method
- Change plan (Pro ↔ Studio, monthly ↔ annual)
- Cancel subscription (you keep access until period end)
- View invoices
Connect Unwired Pro / Studio
The Unwired report flags every hardcoded value in your file that could be wired to a design token. Connect Unwired turns that report into a one-click action: for every exact-match suggestion, the plugin binds the hardcoded value to the matching variable in your Figma file.
What it does
- Scans every component, variant, and inner layer for hardcoded values
- Looks up each value against your local variables (colors via hex match, numbers via exact match)
- If exactly one match exists, suggests
var(--variable-name)
- The Wire N matches button binds every suggestion to its variable in one go — no manual rewiring per layer
Supported properties
- Colors — fills, strokes, text color
- Spacing — padding (4 sides or shorthand), gap, itemSpacing
- Radius — per-corner or shorthand
- Typography — fontSize, lineHeight (text nodes)
- Other — strokeWeight, opacity
How to use it
- Click Scan Changes in the plugin
- If the dashboard shows an Unwired card with a count, click Show Details
- The Unwired modal opens. If you have exact-match suggestions, the top bar shows "Wire N matches" in emerald
- Click → the plugin walks every match and applies the binding. Result appears as "✓ Wired X of Y" in the bar
- The plugin auto-re-scans afterwards so the Unwired count visibly drops
Free tier: you can see the suggestions in the Unwired modal, but the wire button is gated to Pro/Studio. Upgrade to activate one-click wiring.
Limitations
- Exact matches only. If a hardcoded value doesn't match any variable in your file, no suggestion is offered. Fuzzy color matching (e.g.
#181818 → close-to gray/900 at #18181B) is planned for a future release.
- If multiple variables share the same value (common in semantic + primitive layered systems), the plugin picks the first one (typically the primitive). You can manually re-route in Figma if needed.
- Some Figma properties don't support variable binding via the API (e.g. font weight); those will show a clear failure reason in the console.
Troubleshooting
GitHub Token Not Working
Error: "Bad credentials" or "401 Unauthorized"
- ✅ Check token has
repo scope
- ✅ Token hasn't expired
- ✅ No extra spaces when pasting
- ✅ Repository name is correct:
username/repo
Bitbucket Token Not Working
Error: "Invalid credentials"
- ✅ Using API Token (not account password)
- ✅ Token created at
id.atlassian.com/manage-profile/security/api-tokens
- ✅ Username is correct (case-sensitive)
- ✅ Workspace name is correct
- ✅ Repository name is correct
No Variables Detected
Make sure your Figma file has:
- Design variables created (not just styles)
- Variables published in a library (for shared files)
- You have access to view the variables
Export Limit Reached
Free tier allows 5 exports per month. To continue:
- Wait until next month (resets automatically)
- Upgrade to Pro for unlimited exports
Payment Not Processing
- Check your card details are correct
- Ensure card has sufficient funds
- Contact your bank if payment is declined
- Try a different payment method
Plugin Not Detecting Upgrade
After upgrading:
- Close and reopen the plugin
- Wait 10-30 seconds for webhook to process
- Check "My Account" shows Pro status
- Contact support if issue persists
Frequently Asked Questions
Is my data secure?
Yes! We use industry-standard encryption. Your design data is only exported to repositories you specify. Payment info is handled securely by Stripe (we never see your credit card).
Can I use this with private repositories?
Absolutely! The plugin works with both public and private repositories. Just ensure your access token/password has the correct permissions.
What happens to my subscription if I cancel?
You keep Pro access until the end of your billing period. After that, you return to the free tier (5 exports/month). Your data is kept for 30 days in case you resubscribe.
Can I export to multiple repositories?
Yes! You can export to different GitHub and Bitbucket repositories. Just update the repository name before each export.
Do I need to review Pull Requests before merging?
Yes! Always review the generated PR before merging. The plugin exports what it detects, but you should verify the changes are correct.
How do I get support?
- Pro users: Priority support via email
- All users: GitHub Issues
- Email: alexanderburgouk82@gmail.com
Can I get a refund?
Yes! We offer a 30-day money-back guarantee. If you're not satisfied, contact us within 30 days of your purchase for a full refund.
Need More Help?
We're here to help you succeed!
Pro Tip: Star our GitHub repo to stay updated with new features and improvements!